Datasets that have few lists usually have no special need to organize them. Datasets that have many lists, or that want to make a distinction between one set of lists and another, can use categories and sub-categories to organize the lists.
In the left pane of the Recipient Dataset Details screen, lists are displayed in alphabetical order by list name, regardless of the type of list – hosted recipient list or hosted LISTSERV list. The lists are also displayed in a tree-like structure, with the dataset as the root and each list as a node.
A Linked LISTSERV List is shown with a node icon that looks like a sheet of paper with the LISTSERV logo and a small arrow in the lower left corner. For more information about this type of list, see Section 8.3
Managing Linked LISTSERV Lists.
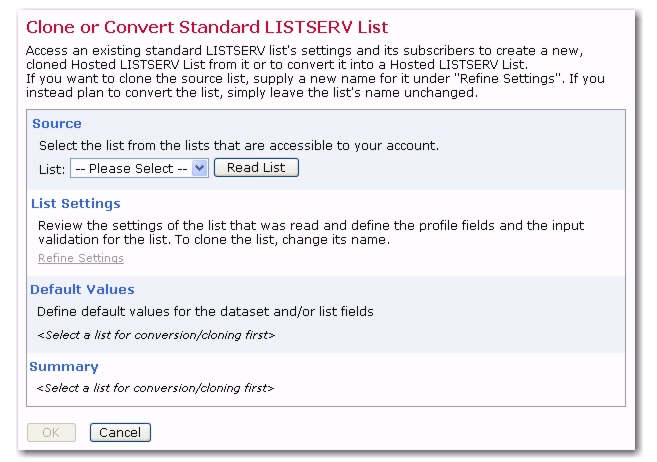
You can now convert an existing normal (not hosted) LISTSERV List into a Hosted LISTSERV List or create a Hosted LISTSERV List as a clone of an existing normal (not hosted) LISTSERV list (without changing the original list). The freshly created Hosted LISTSERV List will be located in the currently selected category, if applicable.
To convert or clone an existing list, click on the dataset in the left pane, and then click Dataset >
Create >
Convert or Clone Standard LISTSERV List. The Clone or Convert Standard List screen opens. Select the list you want to convert/clone from the drop-down menu. The settings and values for the list are displayed. To convert the list, simply leave the settings as is, and then click the
[OK] button. To clone the list, click
Refine Settings and enter a new name for the list. Click the
[OK] button.
|
4.
|
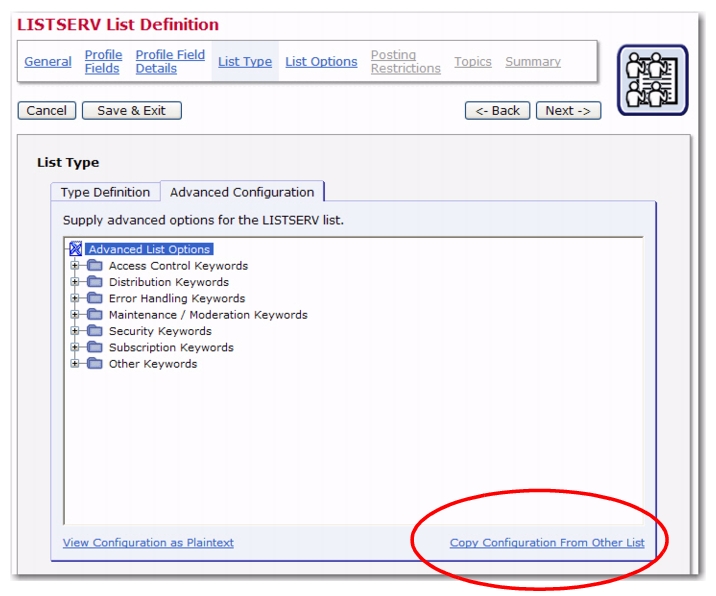
Click on the Copy settings from drop-down menu, select the HLL to copy, and then click [OK]. The settings on the List Type, List Options, and Posting Restrictions pages will be automatically filled in with the settings from the selected HLL.
|
Note: The subscriber information and profile field definitions will not be copied into the new HLL.
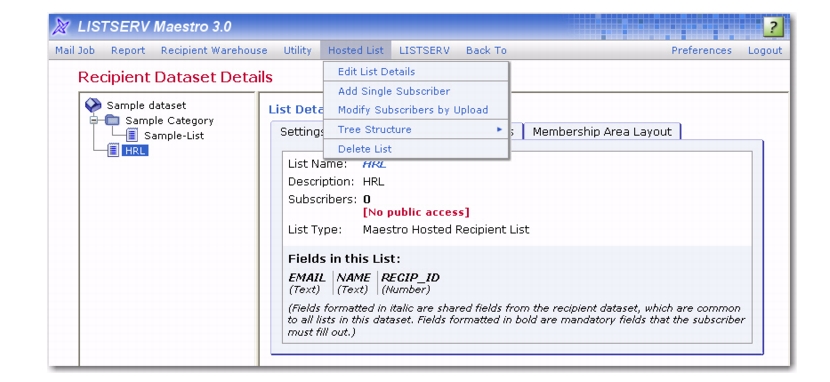
To edit an existing list, select the list in the left pane of the Recipient Dataset Details screen, and then click
Hosted List >
Edit List Details. The list definition wizard for that type of list opens. For information on using a list definition wizard, see Section 6
Creating Hosted Recipient Lists and Section 7
Creating Hosted LISTSERV Lists.
Note: A list is only completely editable if it does not contain subscribers. For lists that do contains subscribers, only certain fields are editable.
To move an existing list into a category, select the list in the left pane of the Recipient Dataset Details screen, and then click
Hosted List >
Tree Structure >
Cut. The list will appear in the dataset as “grayed out”. The list still exists within LISTSERV Maestro, and it has not been disabled in any way. It will remain in its current position in the dataset tree until it is pasted somewhere else. Select the category to move the list into, and then click
Dataset >
Tree Structure >
Paste to move the list into that category. To cancel the cut state and leave the list where it is, select the list in the left frame, and then click
Hosted List >
Tree Structure >
Clear Cut/Copy State.
To delete a list, click on the list that you want to delete in the left pane of the Recipient Dataset Details screen, and then click
Hosted List >
Delete List. Click
[OK] to confirm. This action is not recoverable!
Categories act like folders and sub-folders. They can be created at any time, either before or after the creation of hosted lists. Existing lists can be moved into and out of categories by cutting and pasting. New lists can be created inside existing categories.
To create a new category in a dataset, click Dataset >
Create >
Create Category from the Toolbar. The Recipient Dataset Details screen refreshes and you are able to enter the new categories information in the right pane. In the
Name field, enter the name of the category. The name will appear in the left frame and on any public web pages that subscribers can access. In the
Description field, enter a description of the lists that appear in the category. This description is to assist the data administrator and only appears internally. (The description is optional.)
To edit a category in a dataset, click on the category you want to edit in the left pane of the Recipient Dataset Details screen, and then click
Dataset >
Edit Category. The Recipient Dataset Details screen refreshes and the right pane displays the category’s information, ready for editing. When you are finished editing the category’s information, simply click the
[OK] button to submit the changes. To cancel the editing, click the
[Cancel] button.
To delete a category, click on the category that you want to delete in the left pane of the Recipient Dataset Details screen, and then click
Dataset >
Delete Category. Click
[OK] to confirm. This action is not recoverable!
Now you can create a "link" from your dataset to any existing traditional LISTSERV lists. Once linked, the list is integrated into the member area so that the subscribers can perform the usual tasks from within the member area, i.e. subscribe / unsubscribe / edit settings.
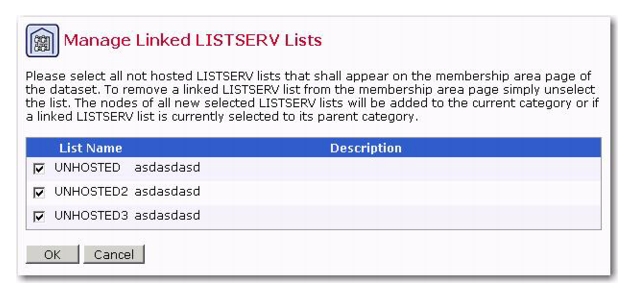
To create a link, click on the dataset in the left pane, and then click Dataset >
Refresh and Manage Linked LISTSERV Lists. The Manage Linked LISTSERV Lists screen opens. From here, define which normal (not hosted) LISTSERV lists that exist on your LISTSERV server will also appear in the selected dataset.
The screen displays a table with all normal LISTSERV lists (all LISTSERV which are not Hosted LISTSERV Lists, either of this or any other LISTSERV Maestro instance) that currently exist at the LISTSERV server (and which are visible to your account).
Check those lists for which you want a link to appear in the current dataset. The link will appear in form of a Linked LISTSERV List node in the dataset tree, either in the currently selected category or in the tree-root (if no category is selected).
Uncheck any LISTSERV list that has been linked previously to remove the link to this list. The corresponding Linked LISTSERV List node will also be removed from the dataset tree, no matter in which category (or tree-root) it is located.
Click [OK] to submit your changes or
[Cancel] to exit without submitting the changes.
Once a normal LISTSERV list has been "linked" into the dataset in this fashion, it will appear as an available list in the dataset's membership area so that subscribers can subscribe themselves to or unsubscribe from this list.
After you have created a Linked LISTSERV List node, you can move it to a different category in the dataset tree with the usual Cut & Paste operations. You can also access details of the LISTSERV list (like the name and title) from inside of LISTSERV Maestro. And, if the LISTSERV Maestro administrator has configured the system accordingly, there will also be a menu option that allows you to directly open the list configuration page of this list in the LISTSERV Web Interface.
Note: While it is possible to create a link to one and the same LISTSERV list in several datasets, this should normally be avoided (except for in special cases), as it may confuse subscribers that the same list is available in different membership areas.